

How To Use Pi Camera
2. Getting Started
Warning
Brand certain your Pi is off while installing the photographic camera module. Although it is possible to install the camera while the Pi is on, this isn't expert practice (if the camera is active when removed, it's possible to damage it).
Connect your photographic camera module to the CSI port on your Raspberry Pi; this is the long thin port adjacent to the HDMI socket. Gently lift the neckband on top of the CSI port (if it comes off, don't worry, you lot can push button information technology back in simply endeavour to be more gentle in future!). Slide the ribbon cablevision of the camera module into the port with the bluish side facing the Ethernet port (or where the Ethernet port would be if y'all've got a model A/A+).
Once the cable is seated in the port, press the collar dorsum downward to lock the cable in place. If done properly you lot should be able to easily lift the Pi past the camera's cable without it falling out. The following illustrations evidence a well-seated camera cable with the correct orientation:
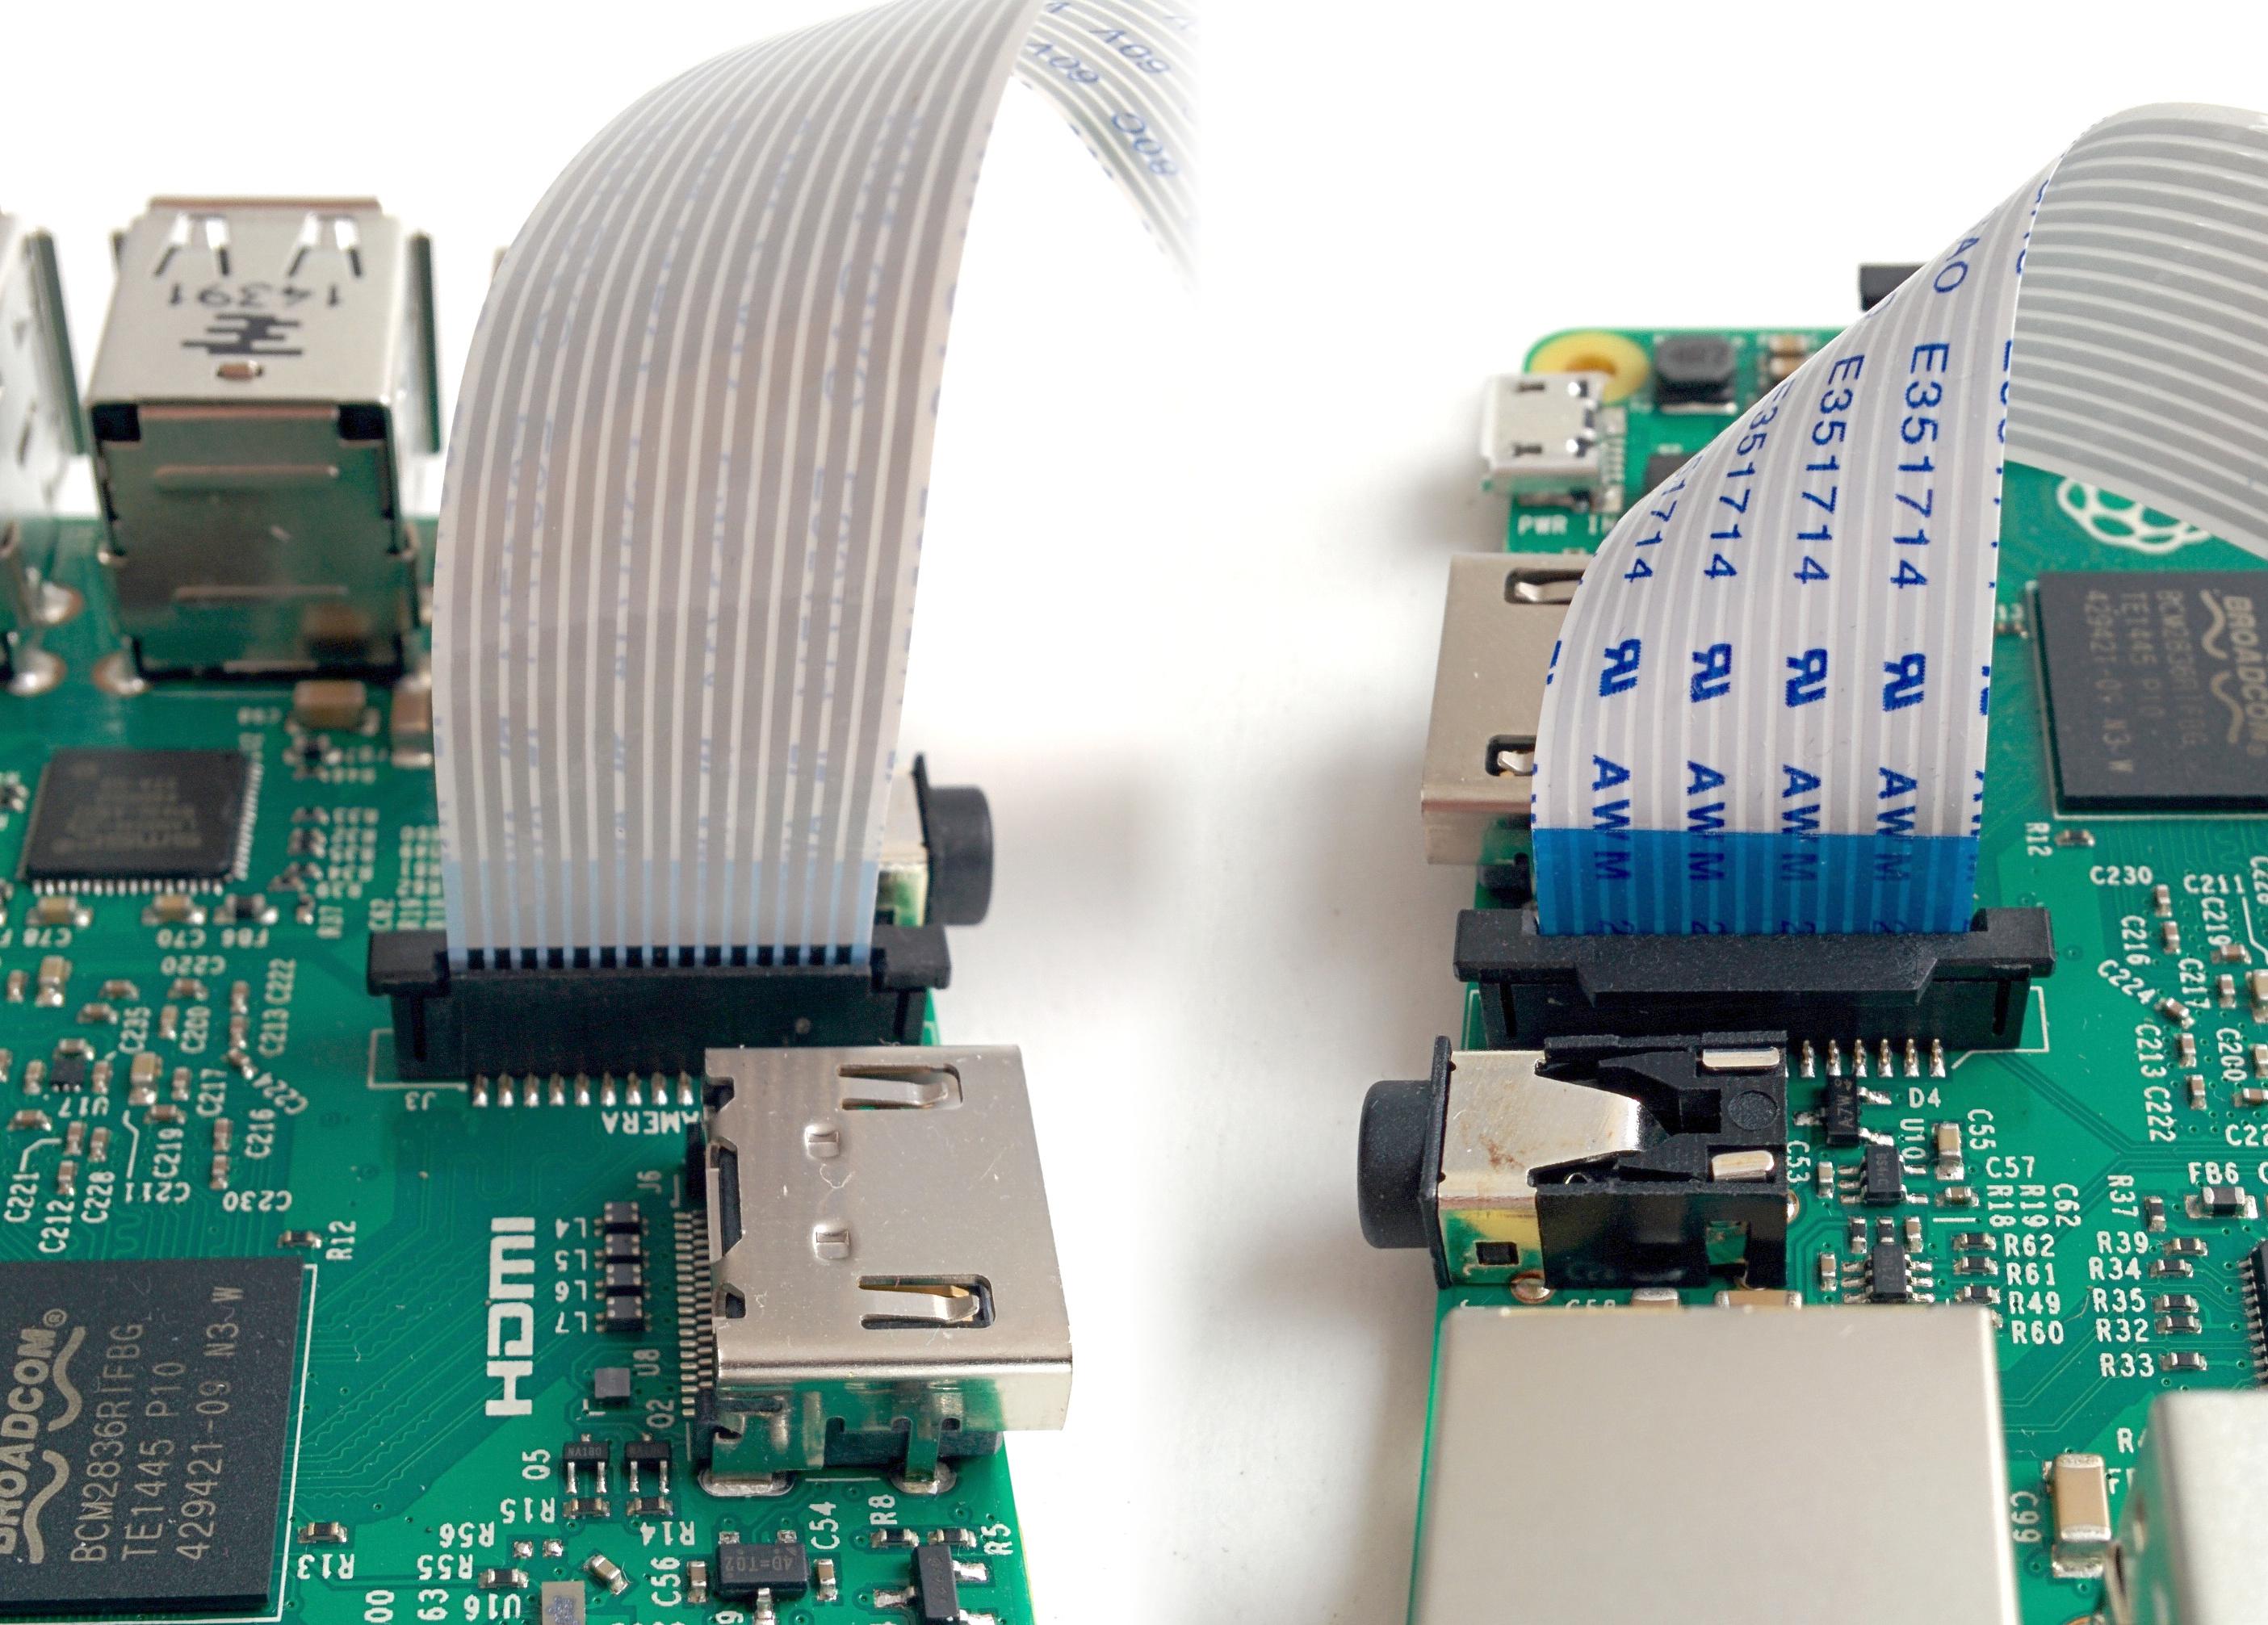
Make sure the photographic camera module isn't sat on annihilation conductive (e.g. the Pi's USB ports or its GPIO pins).
2.1. Pi Zero
The 1.2 model of the Raspberry Pi Zero includes a pocket-sized course-cistron CSI port which requires a camera adapter cable.
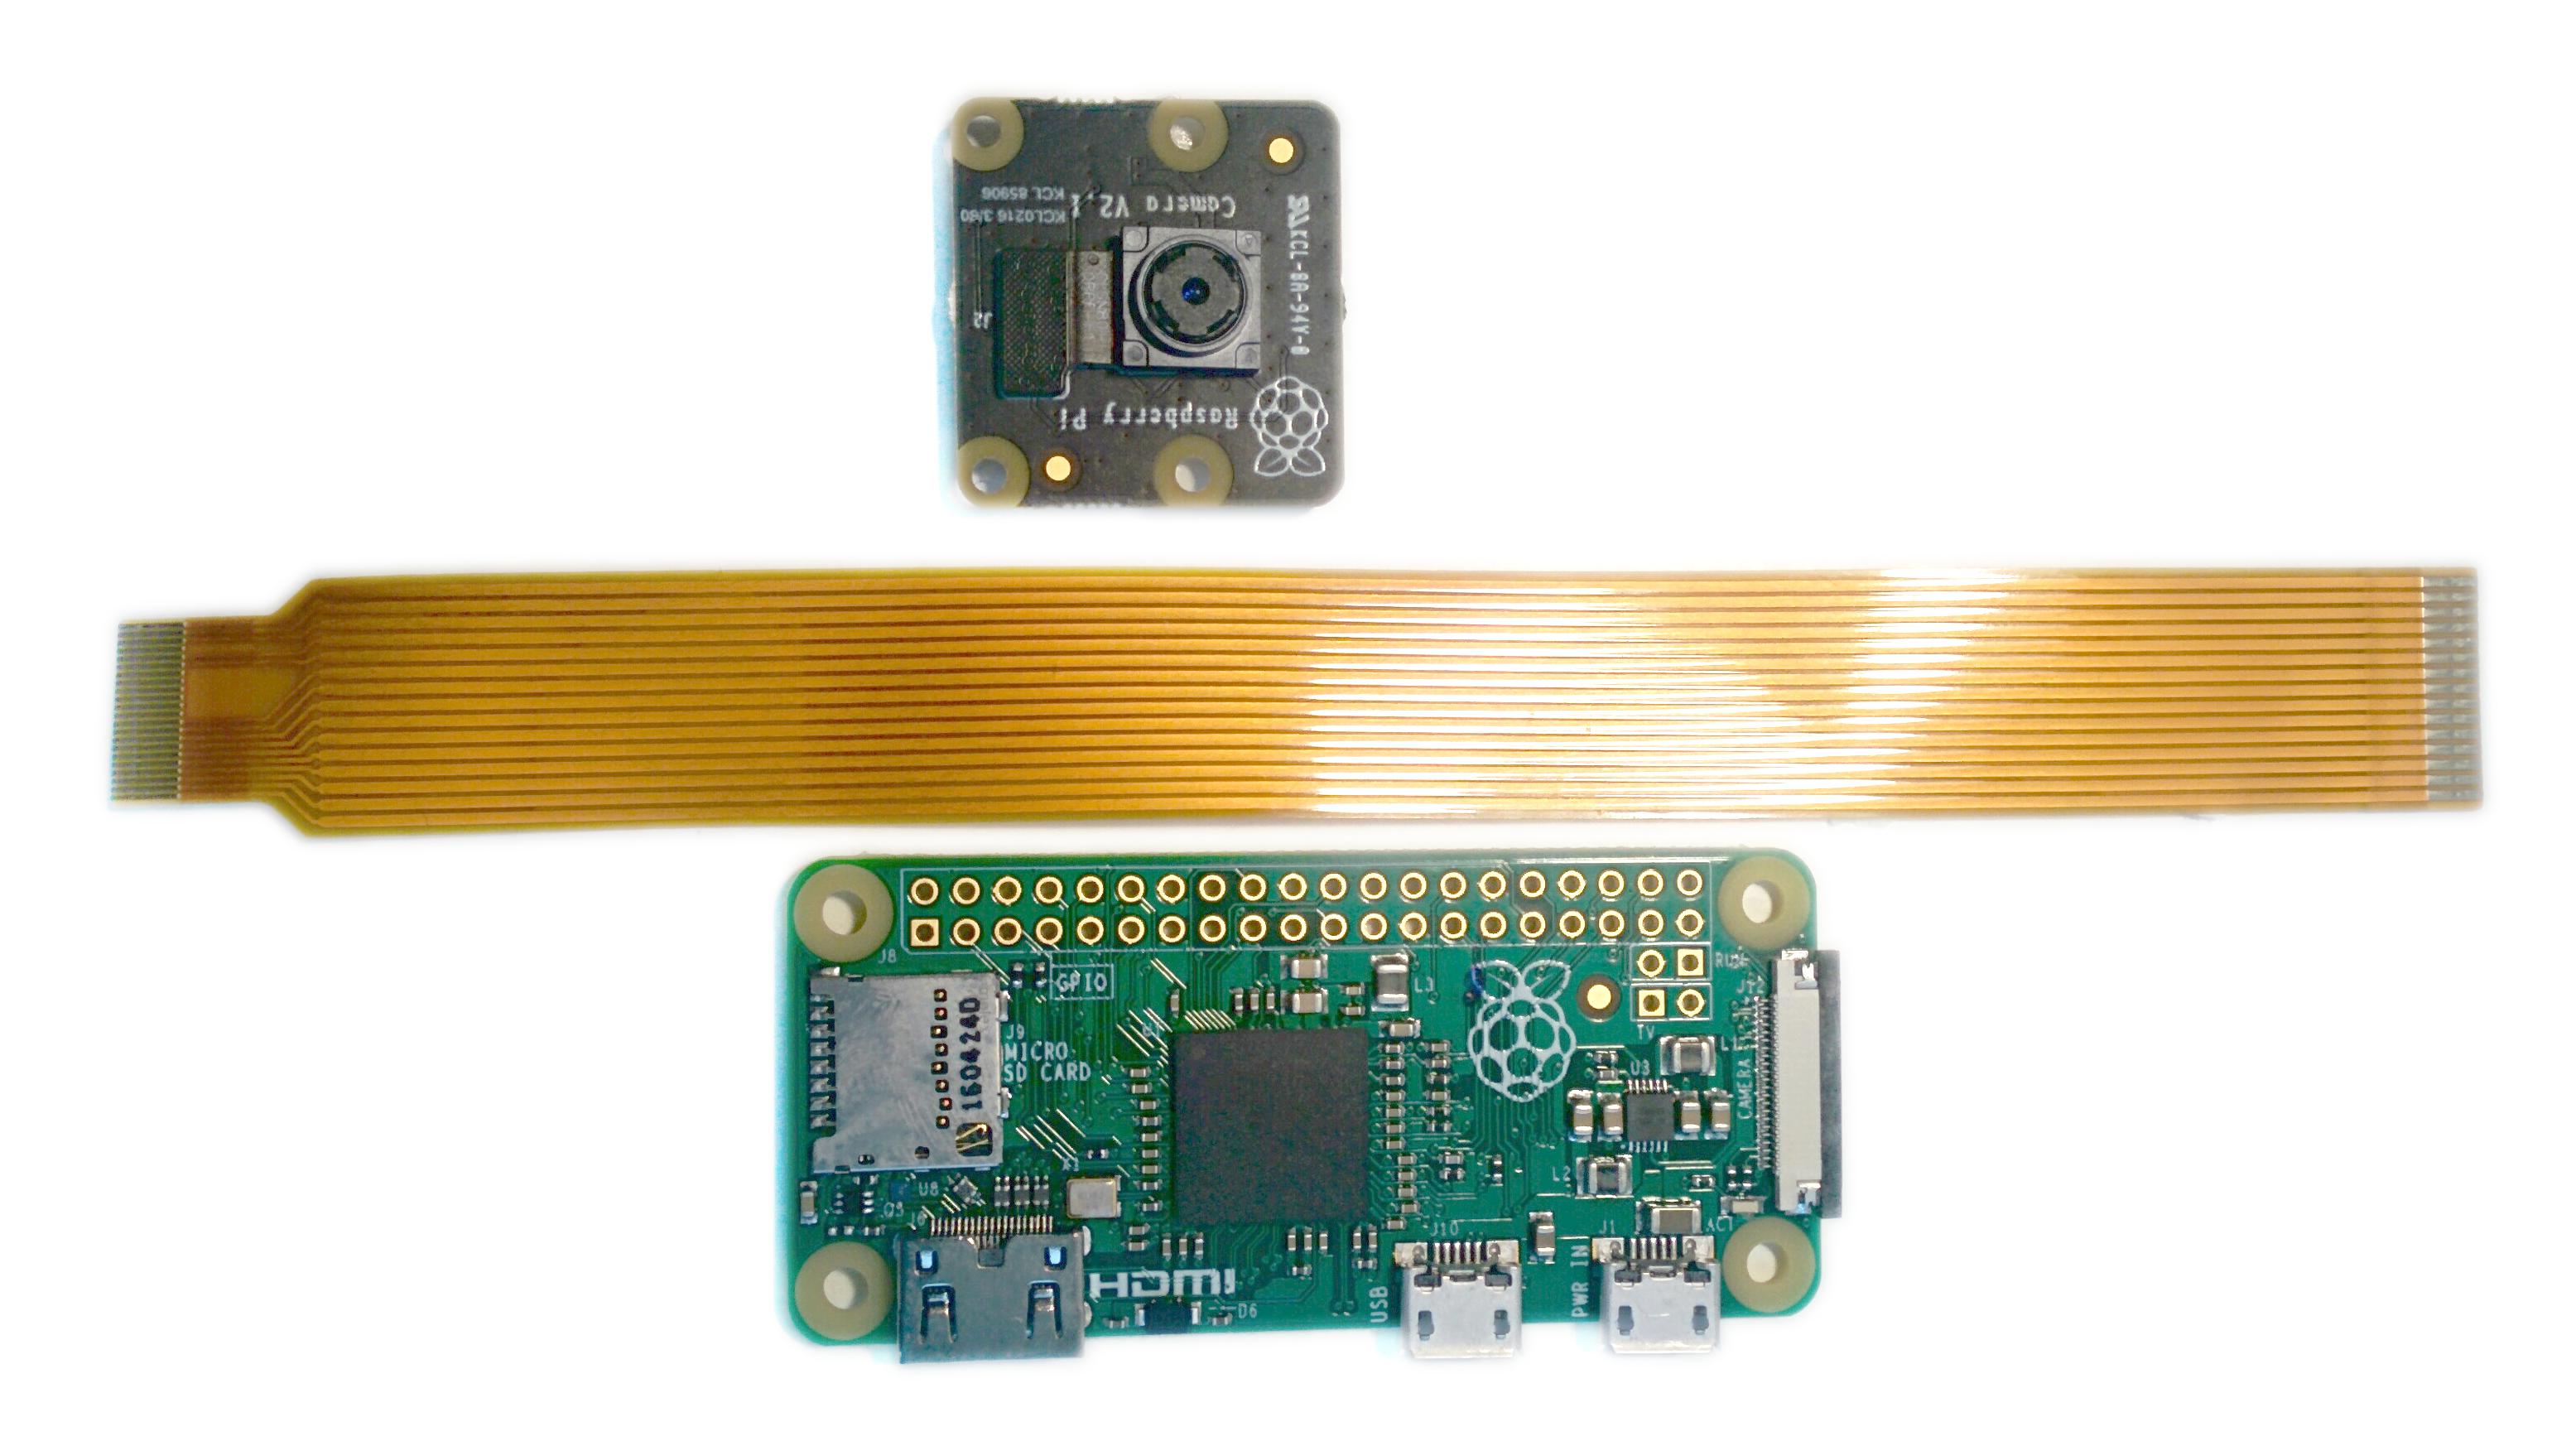
To attach a camera module to a Pi Zero:
- Remove the existing camera module'due south cable by gently lifting the neckband on the camera module and pulling the cable out.
- Next, insert the wider end of the adapter cablevision with the conductors facing in the same direction as the camera's lens.
- Finally, attach the adapter to the Pi Zero by gently lifting the collar at the edge of the lath (be careful with this as they are more than frail than the collars on the regular CSI ports) and inserting the smaller end of the adapter with the conductors facing the back of the Pi Zero.
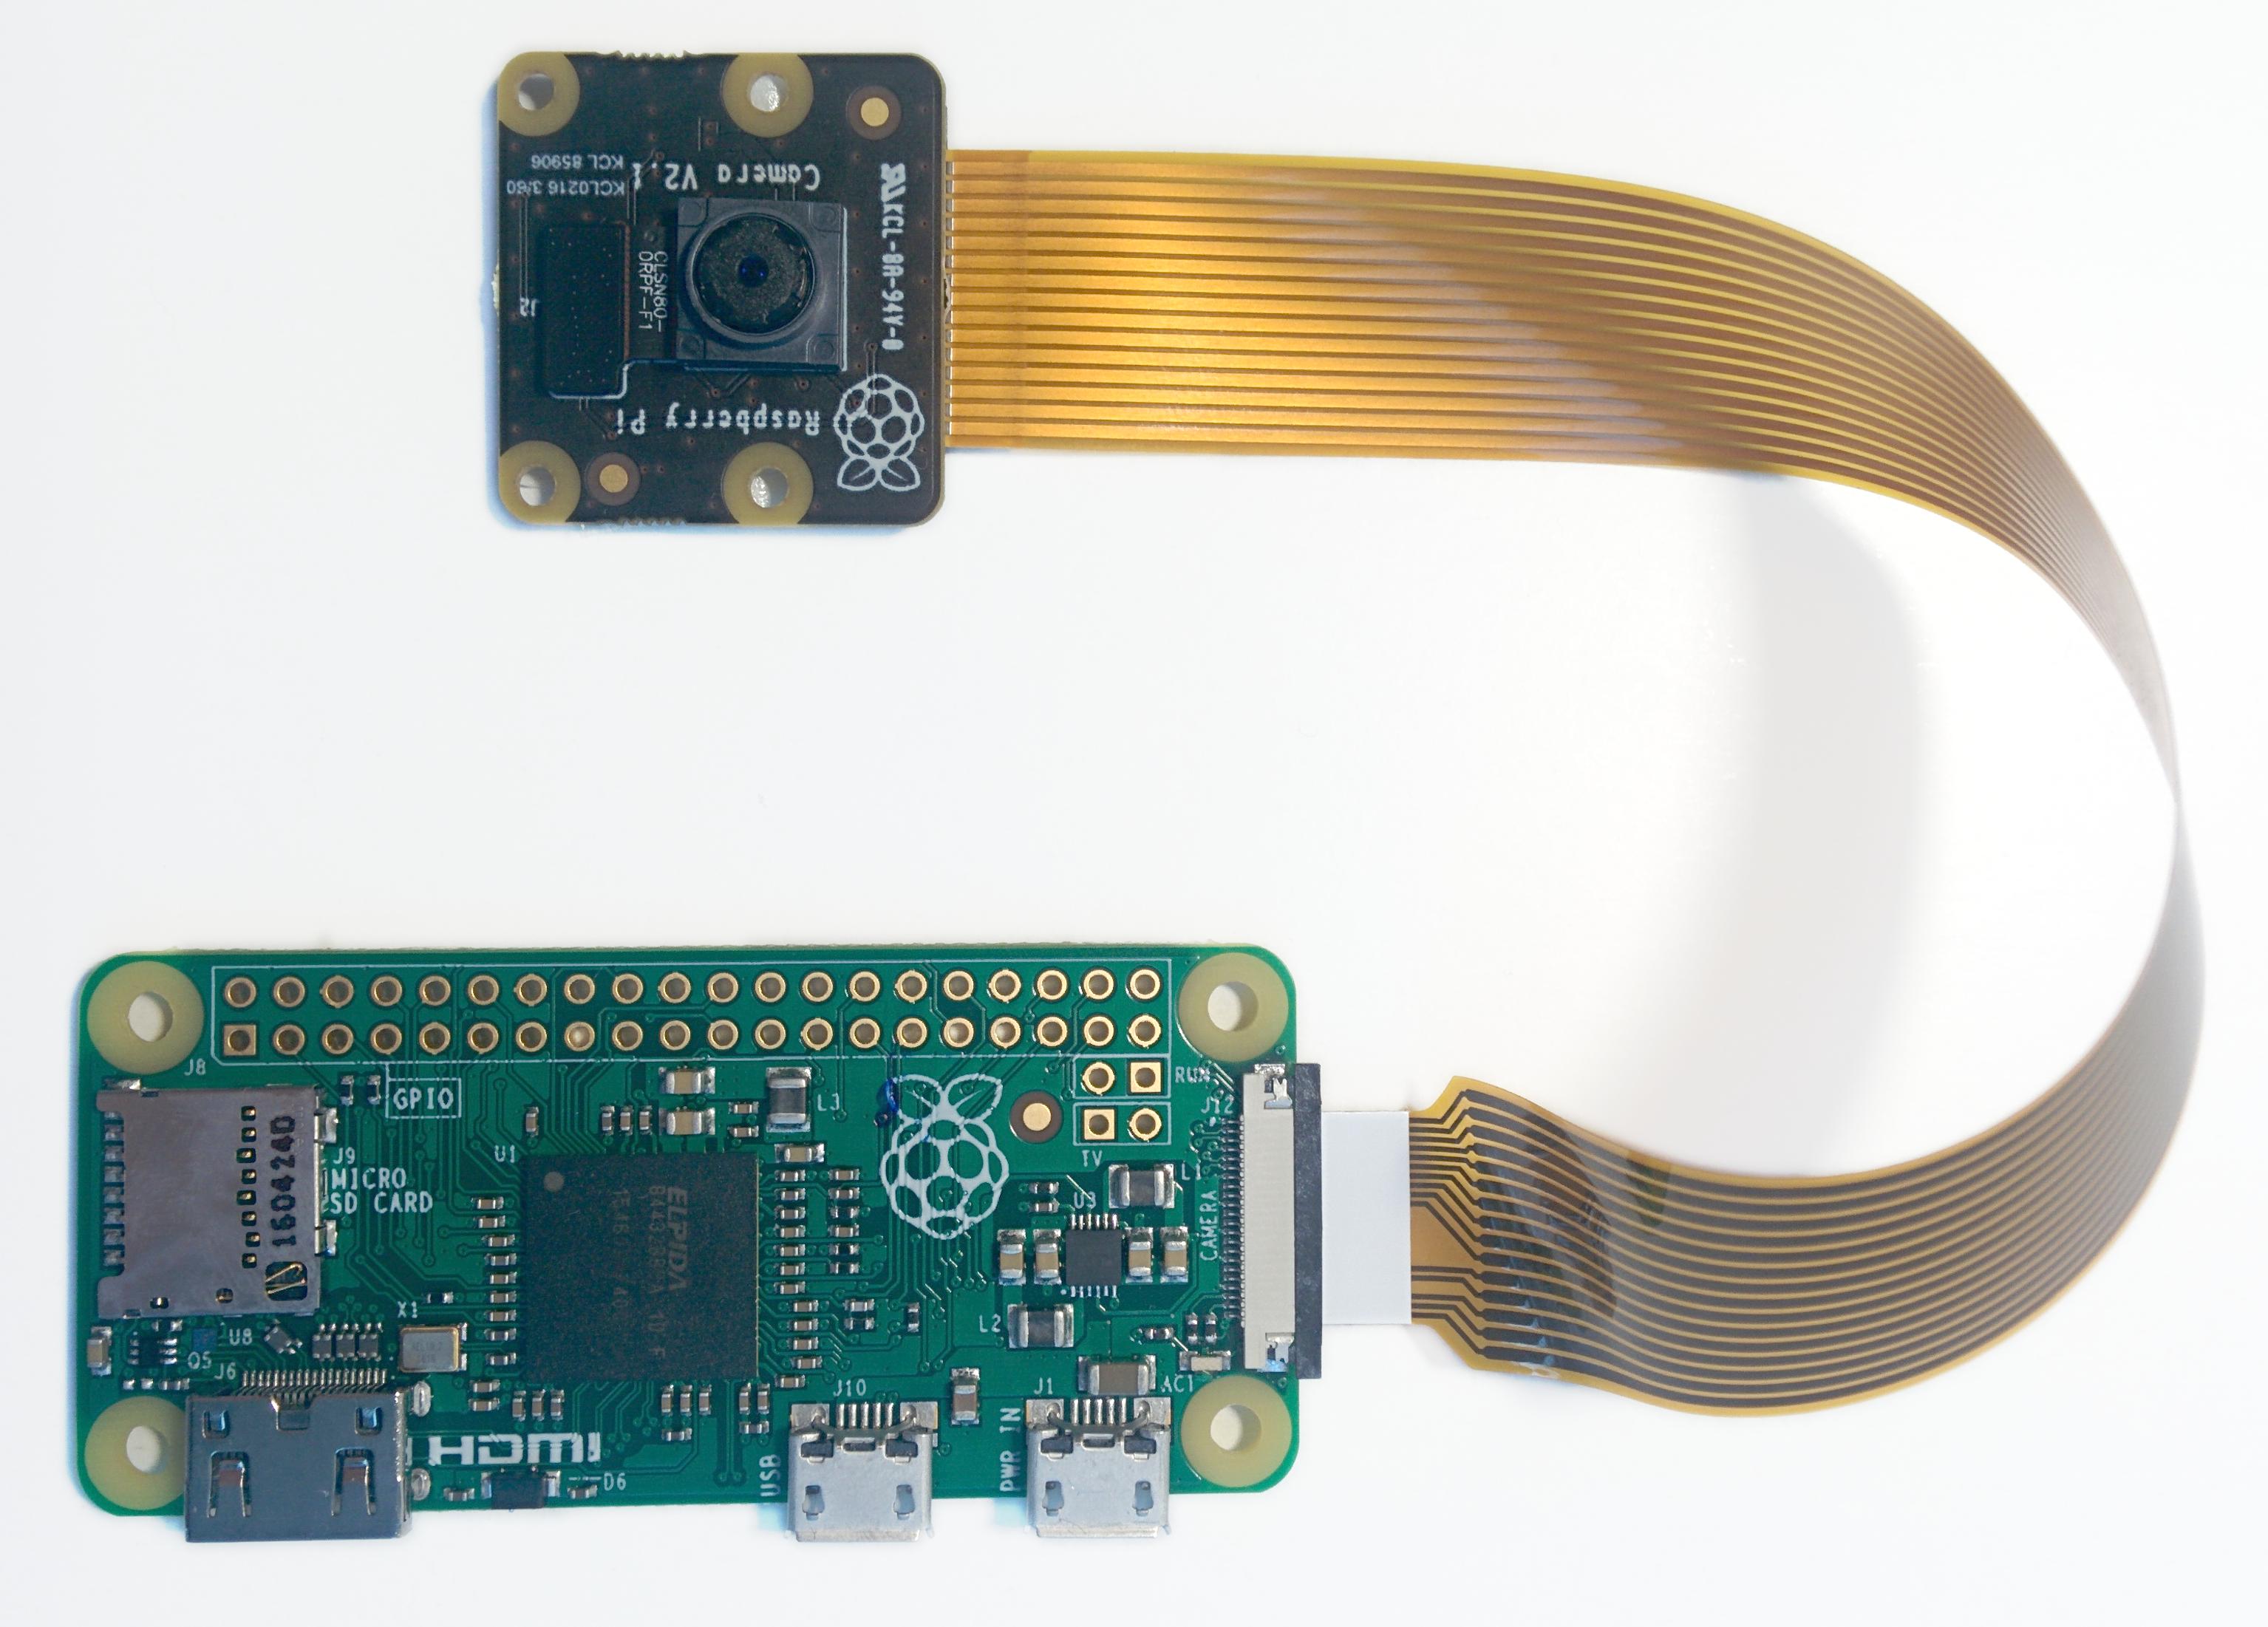
Your setup should await something like this:
ii.2. Testing
Now, apply power to your Pi. In one case booted, start the Raspberry Pi Configuration utility and enable the camera module:

You will need to reboot later on doing this (but this is 1-time setup and so y'all won't need to do information technology again unless you re-install your operating system or switch SD cards). Once rebooted, outset a last and try the following command:
If everything is working correctly, the camera should showtime, a preview from the camera should appear on the display and, after a 5 2nd delay information technology should capture an image (storing information technology as image.jpg ) earlier shutting downwardly the camera. Proceed to the Basic Recipes.
If something else happens, read whatever error message displayed and try whatsoever recommendations suggested by such messages. If your Pi reboots as presently every bit you run this command, your power supply is bereft for running your Pi plus the camera module (and whatever other peripherals y'all accept attached).
Source: https://picamera.readthedocs.io/en/release-1.13/quickstart.html
Posted by: spenceroune1970.blogspot.com
0 Response to "How To Use Pi Camera"
Post a Comment